Updated October 2, 2020
Cisco is constantly updating Webex to provide more options for teachers to better control their meetings. As a result, your toolkit and the ‘best practice’ recommendations are continually evolving! With the September 2020 release, staff now have the ability to block non-Westside users from joining their meetings as well as the ability to lock scheduled meetings and force all attendees to wait in the lobby before being admitted.
The directions below will walk you through configuring the security settings for STARTING meetings and controlling who joins. DURING meetings, be sure to check out this article for advices on configuring participant permissions during your meeting (i.e., who they can chat with, how to screen share, etc.).
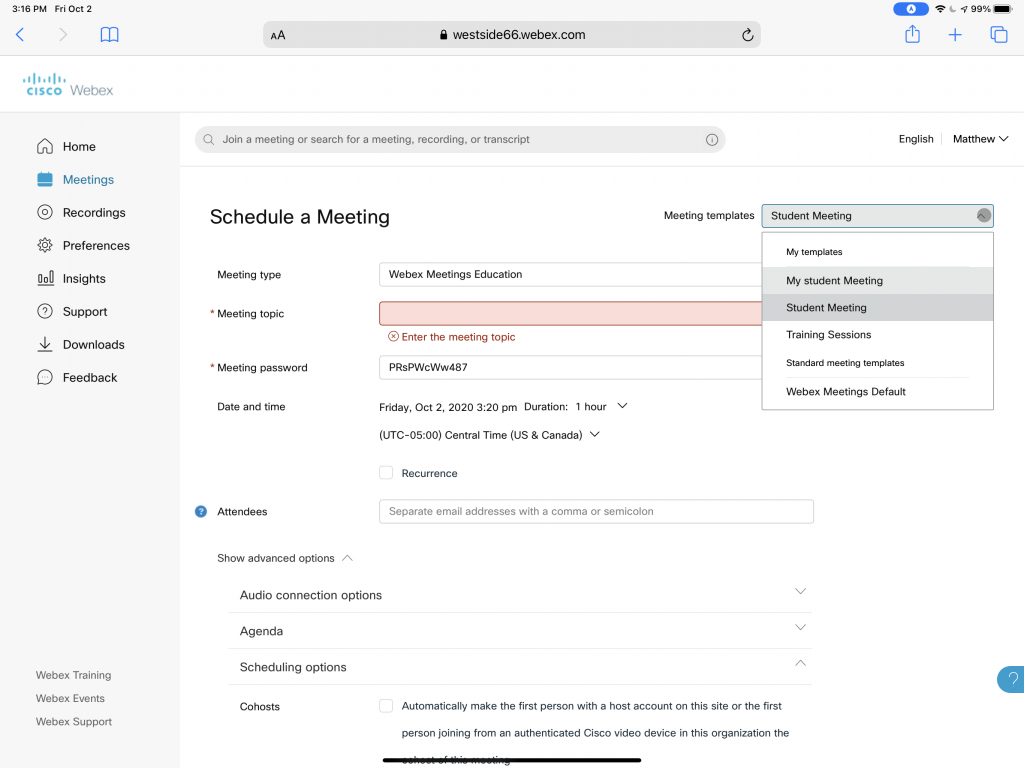
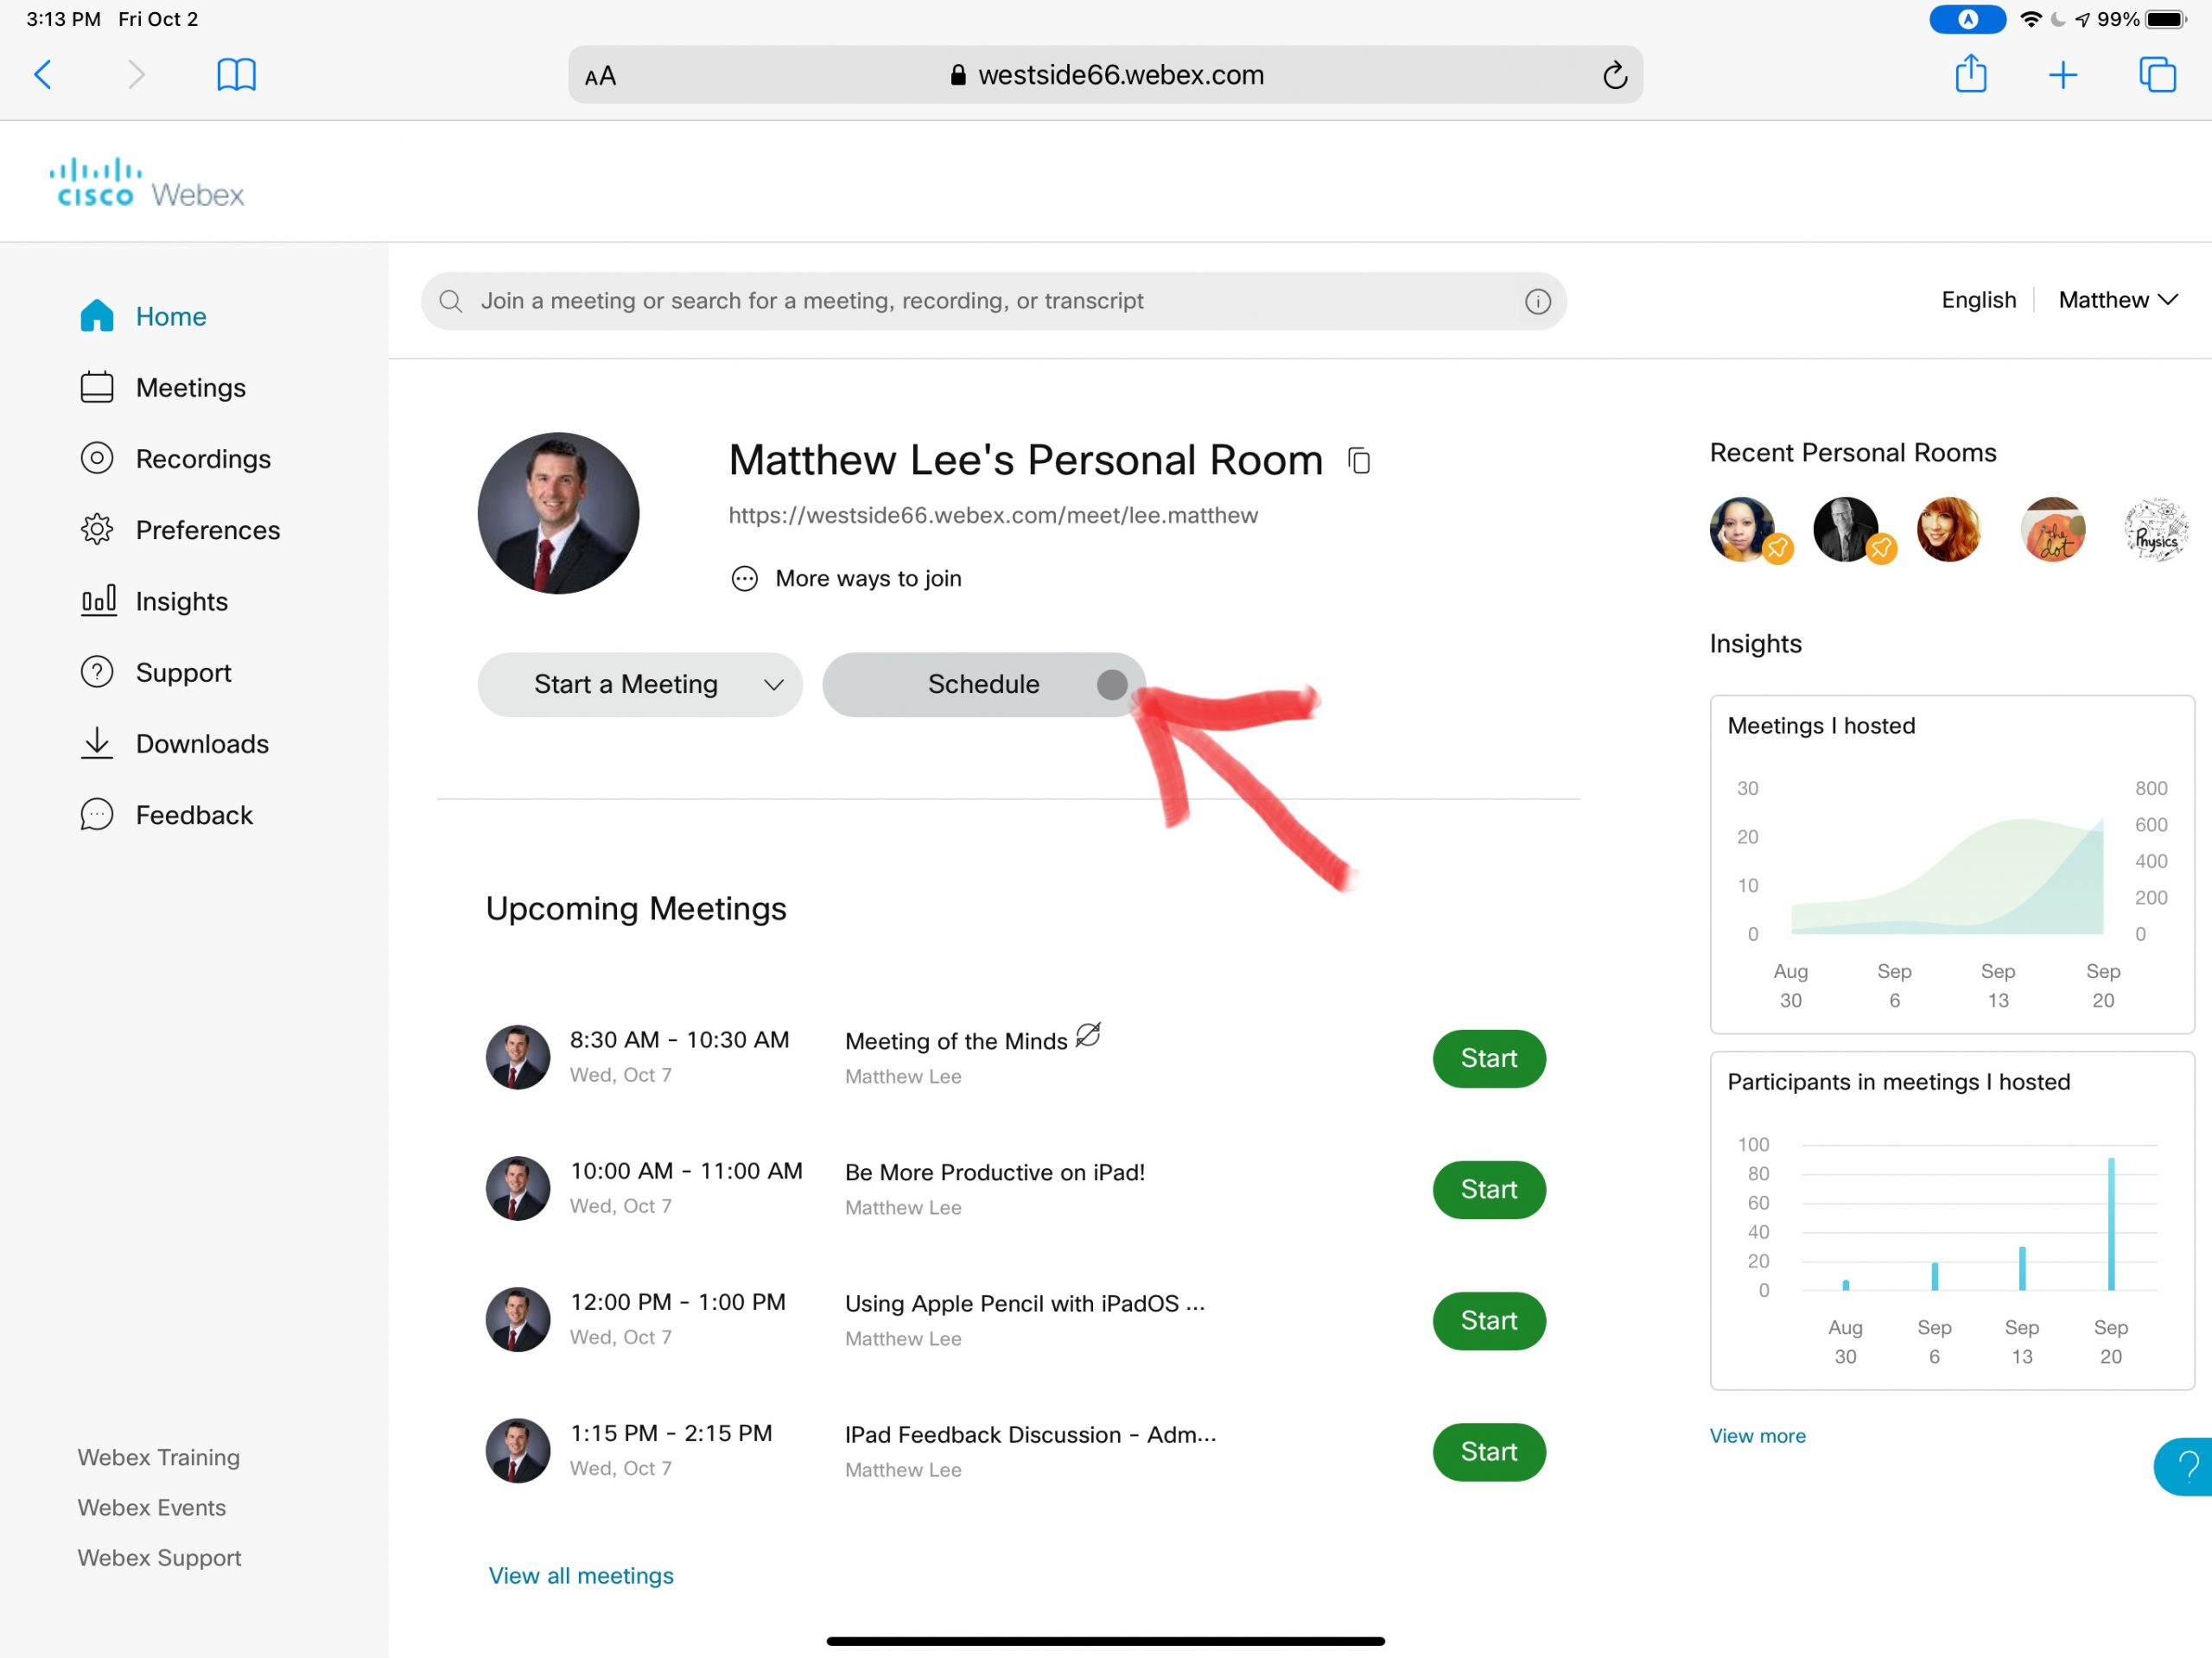
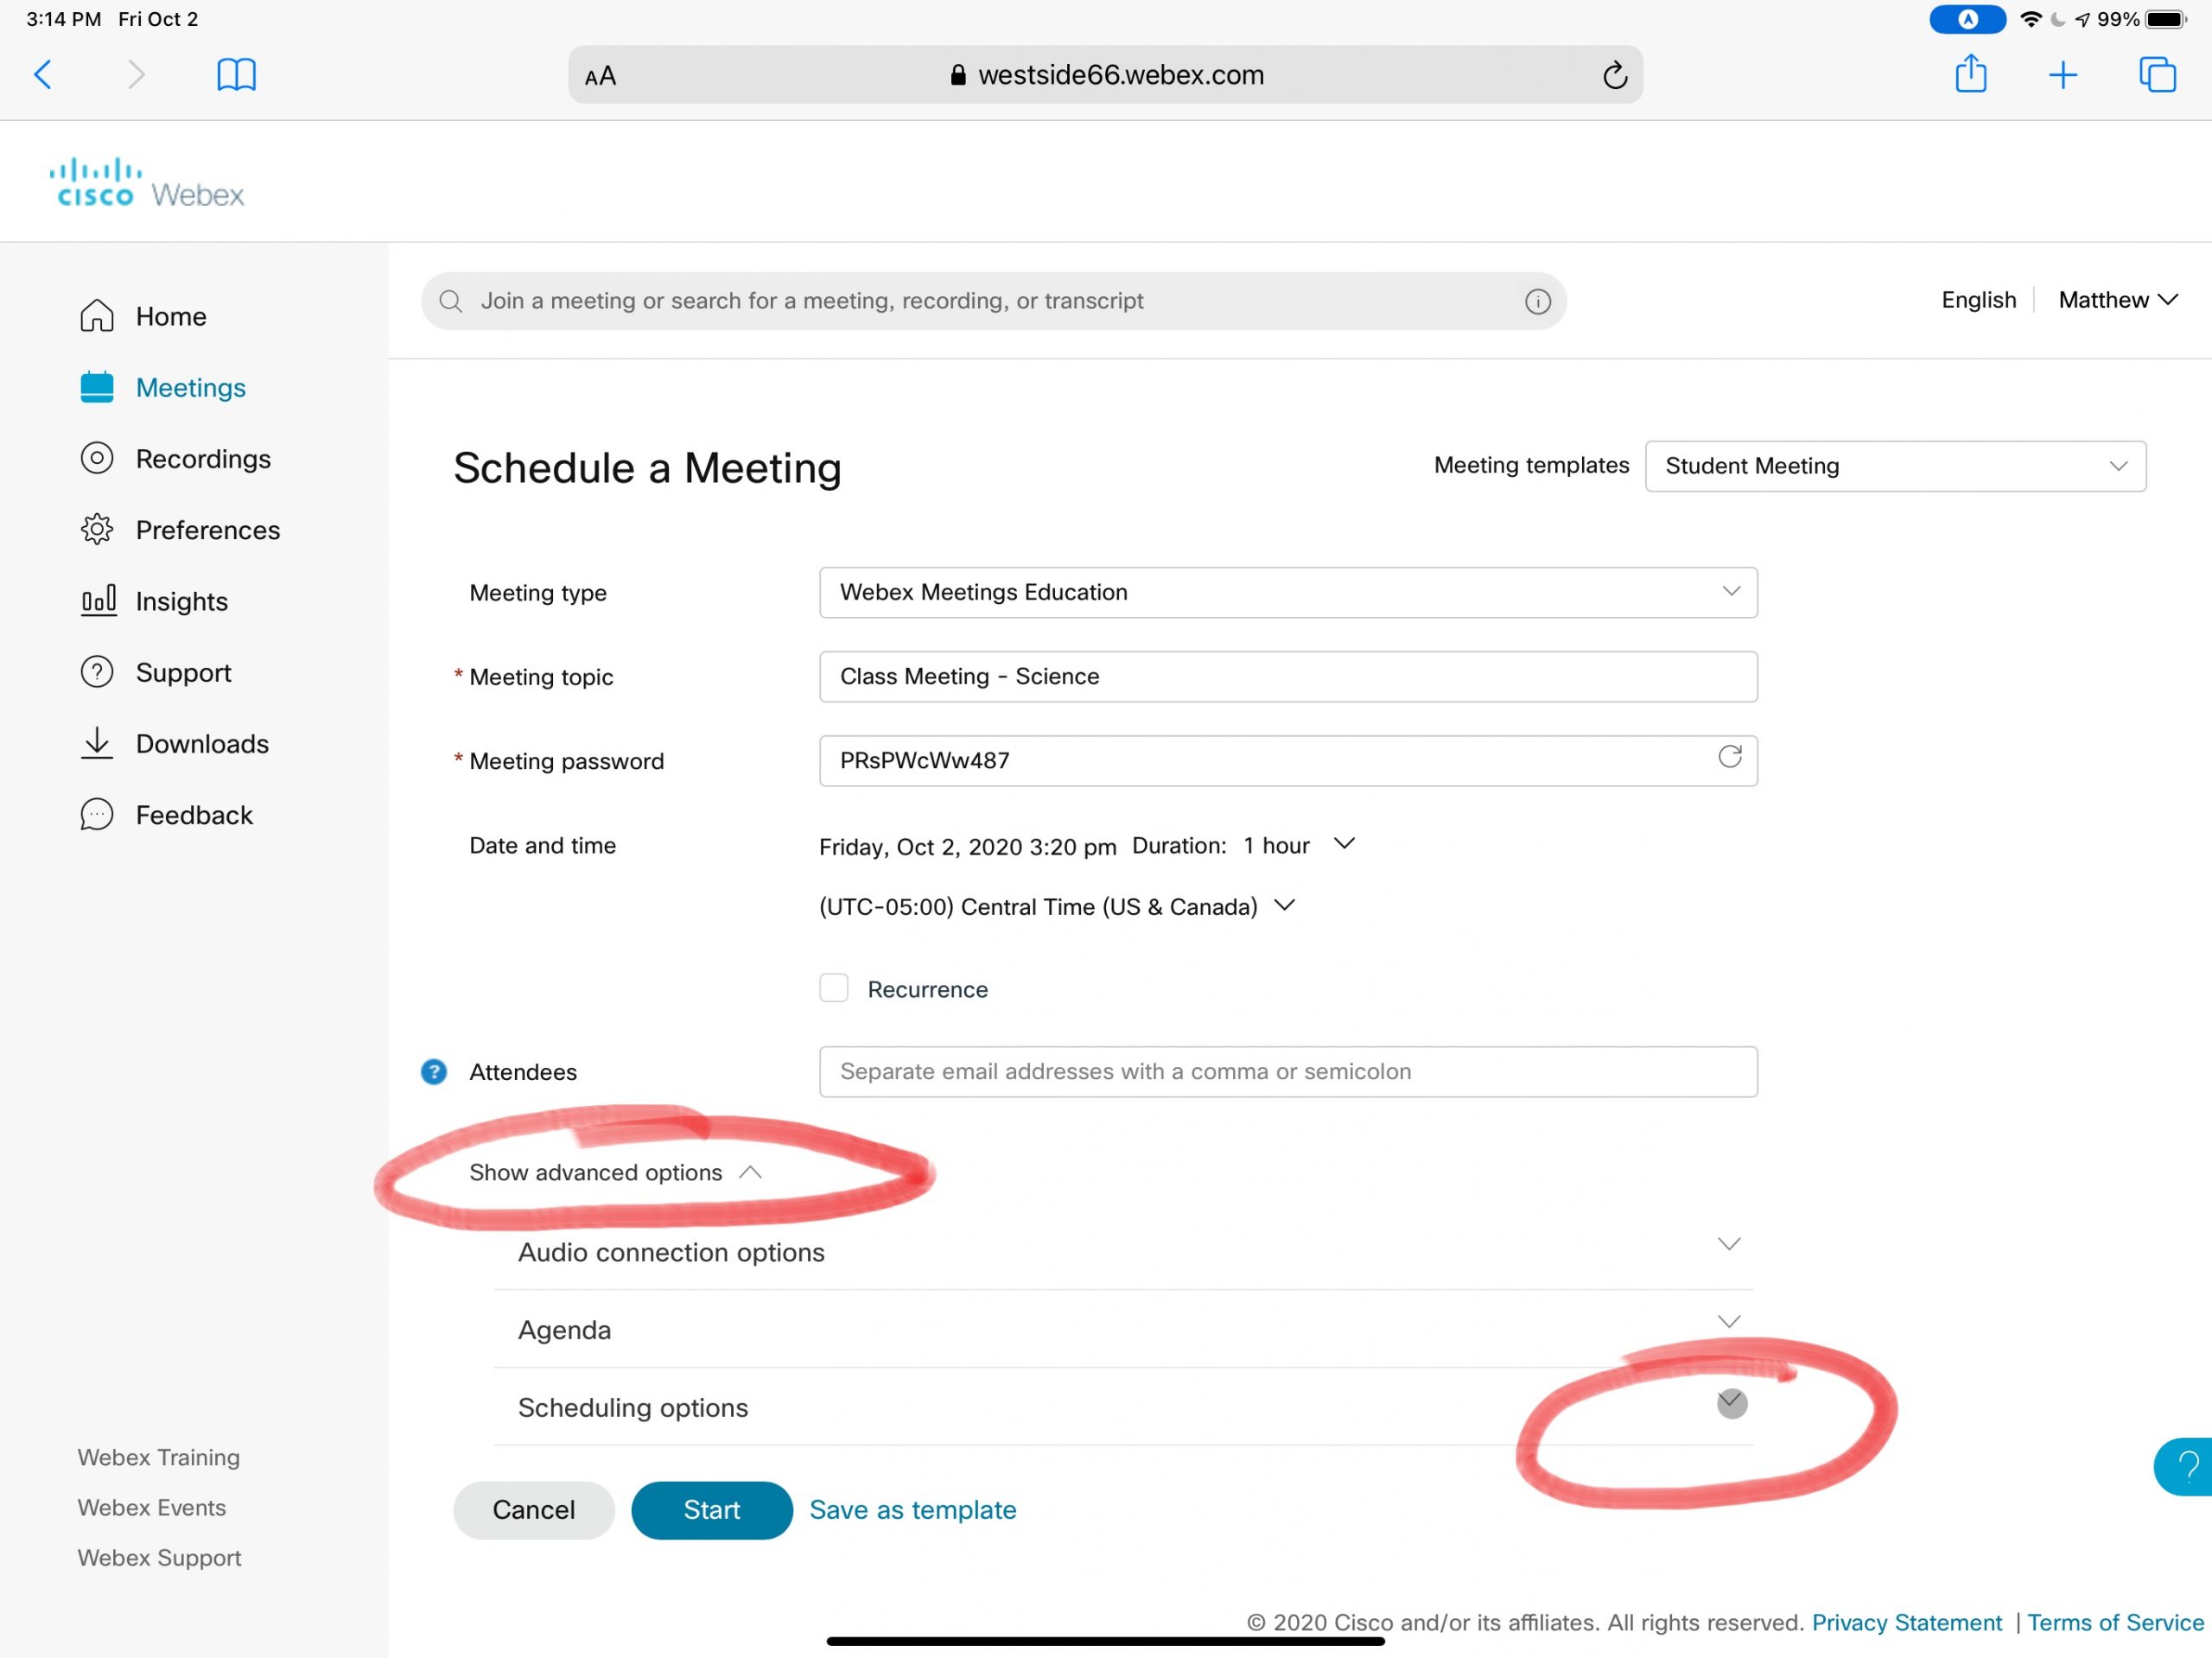
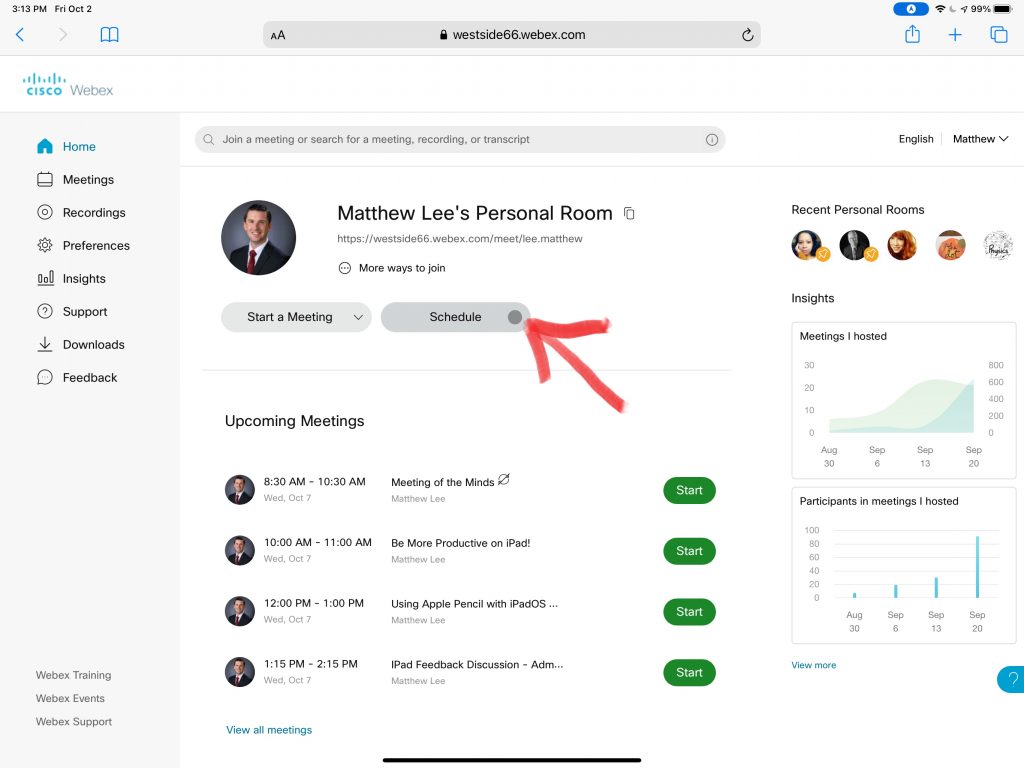
Once you decide what settings you prefer to use in a particular situation, you can save all of those options in one template that can be quickly selected when you schedule a meeting.
As with anything however there are trade offs. With increased security comes increased complexity and decreased convenience. It will be up to you to decide how you balance that equation.
For each option below, use the left and right arrows to scroll through the slide show.
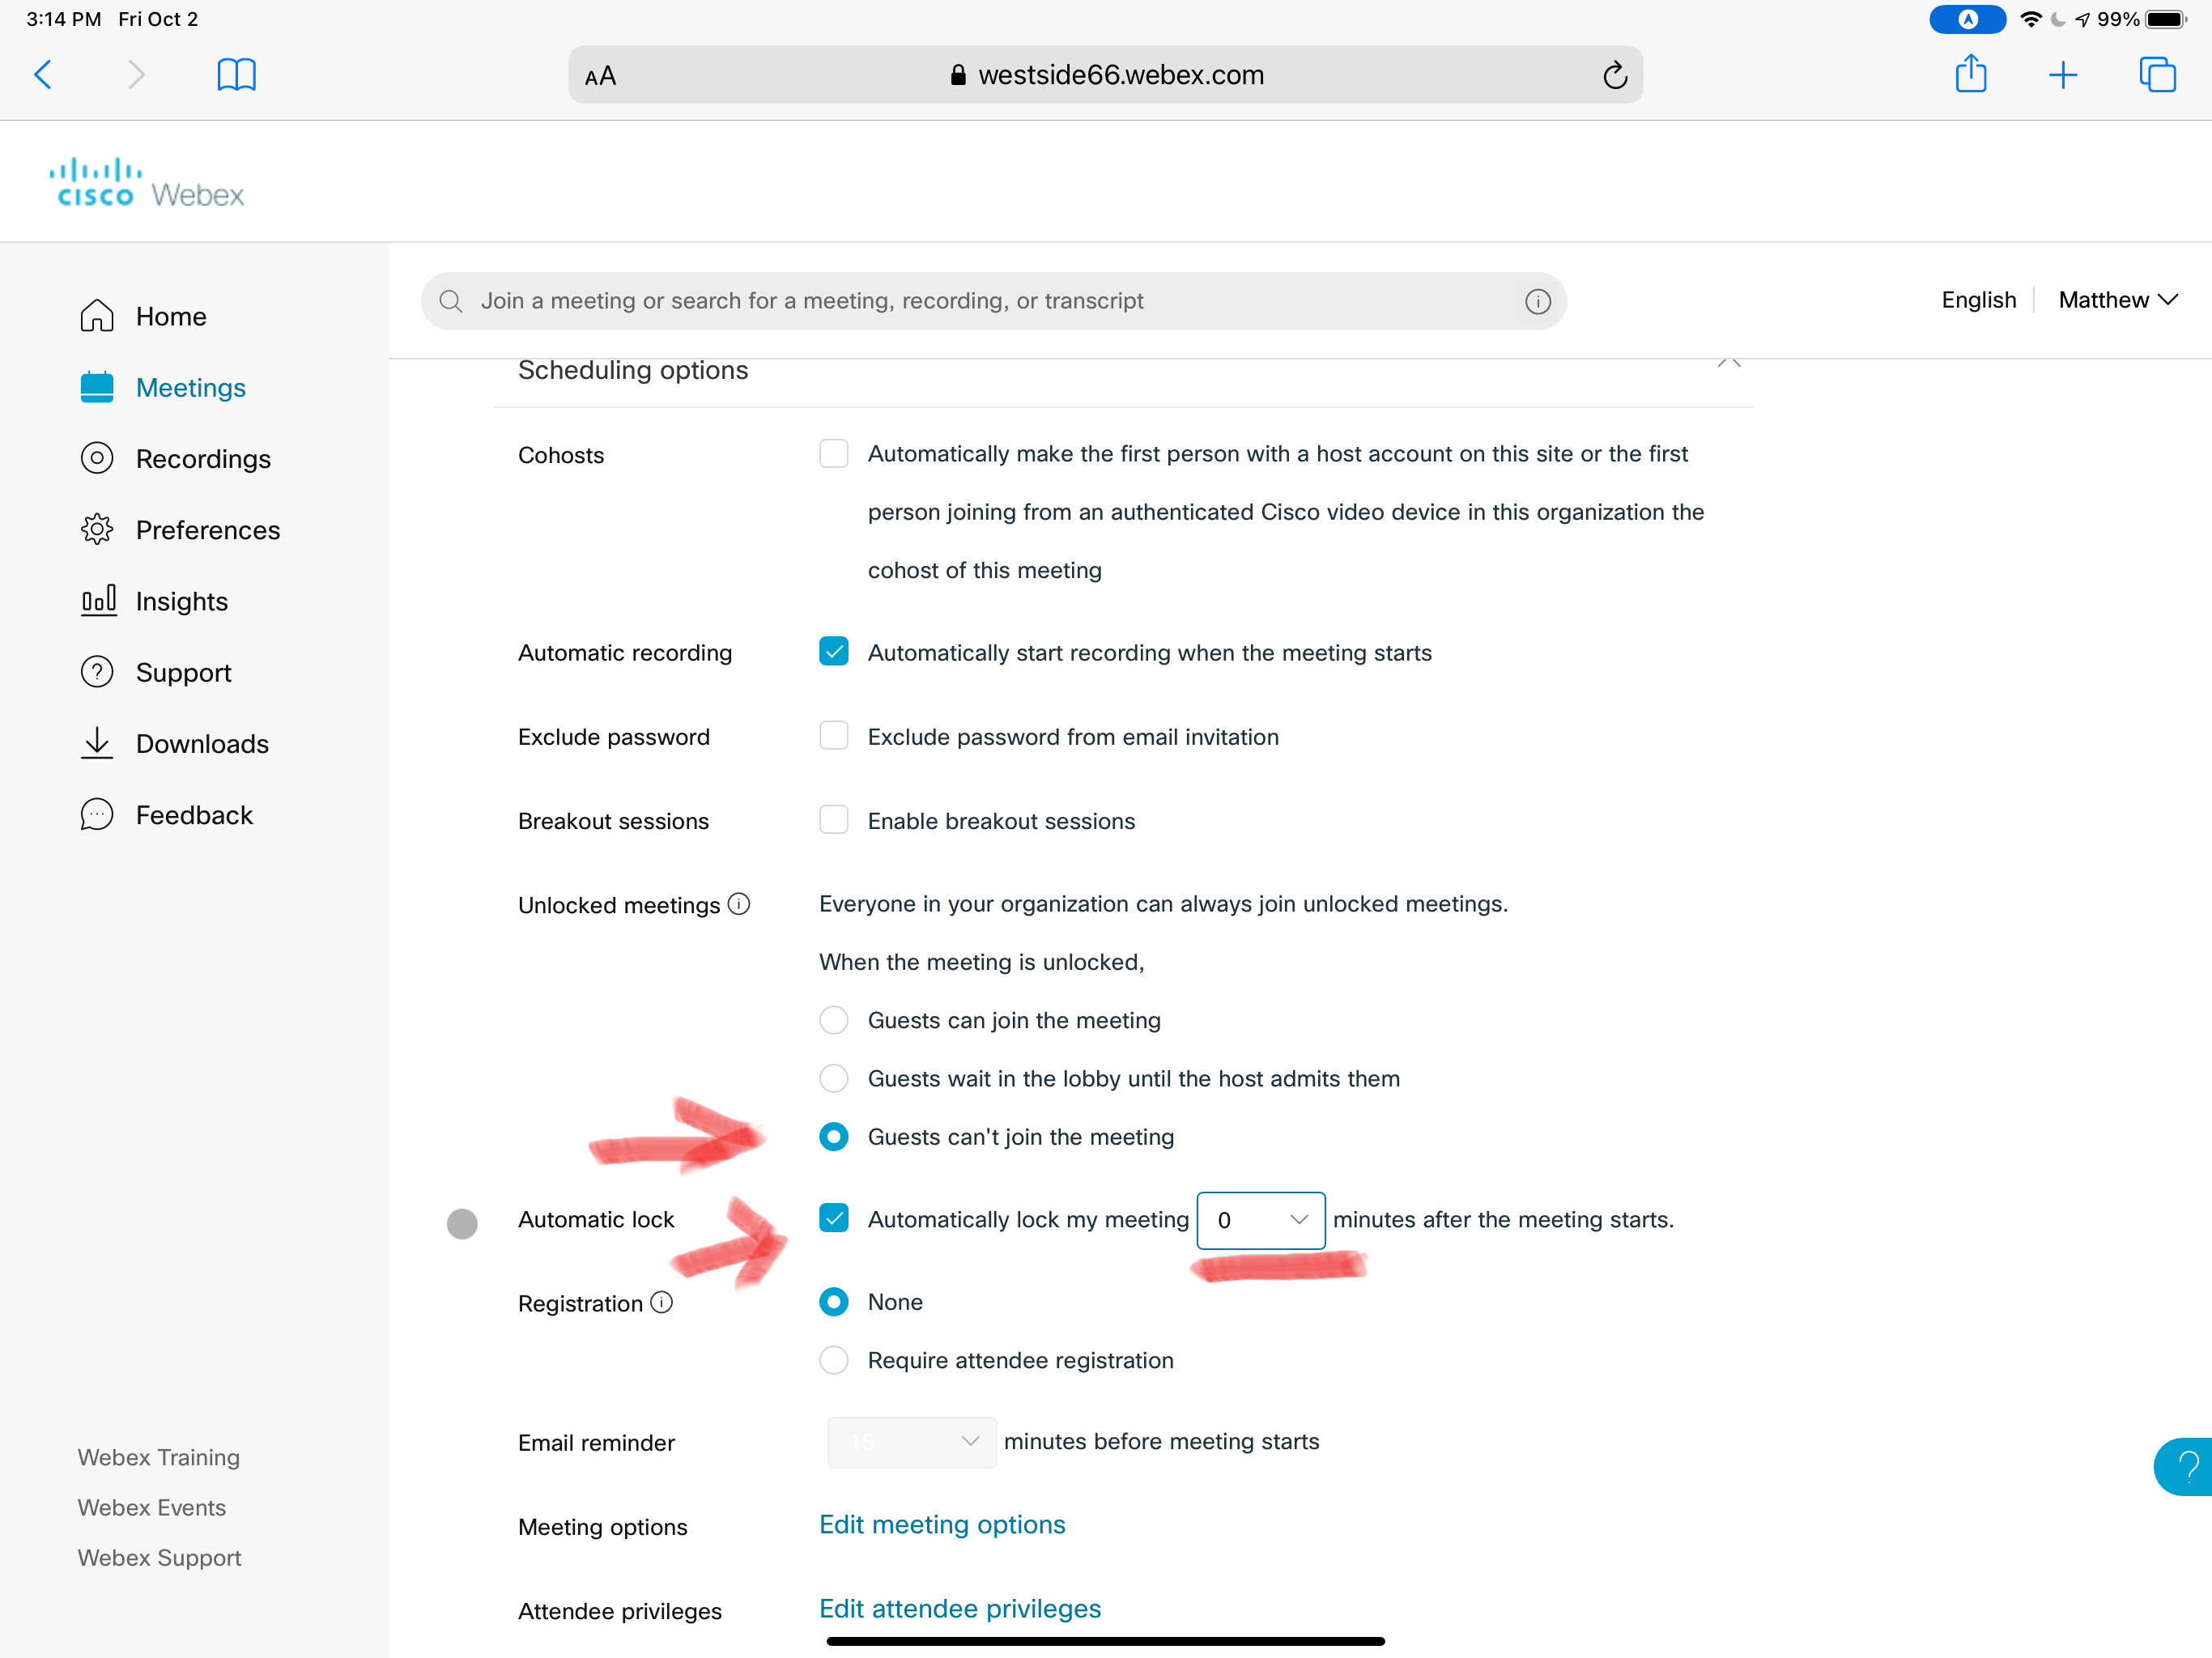
Option 1: Maximum Security
Are you worried about students joining your meeting under a fake name? Worried about students that aren’t in your class joining your meetings? Then this setting may be for you.
Trade Offs: With these settings, you will NOT be able to have guest speakers, parents, or other non-Westside accounts join the meeting. You also will need to manually admit students into your meeting at the start of each session. Students joining late will also need to be manually admitted.

Option 2: Medium Security
Maybe you aren’t as worried about other students joining your meetings, but would like to prevent non-Westside accounts from joining. This is a good ‘middle ground’ for most teachers looking for an increased level of security.
Trade Offs: Do note however, that this setting prevents guest speakers, parents, and other guests from joining. It will also prevent students who might not be logged in to Webex from joining your meetings (i.e., accessing from a parents computer and not having their log in information handy).

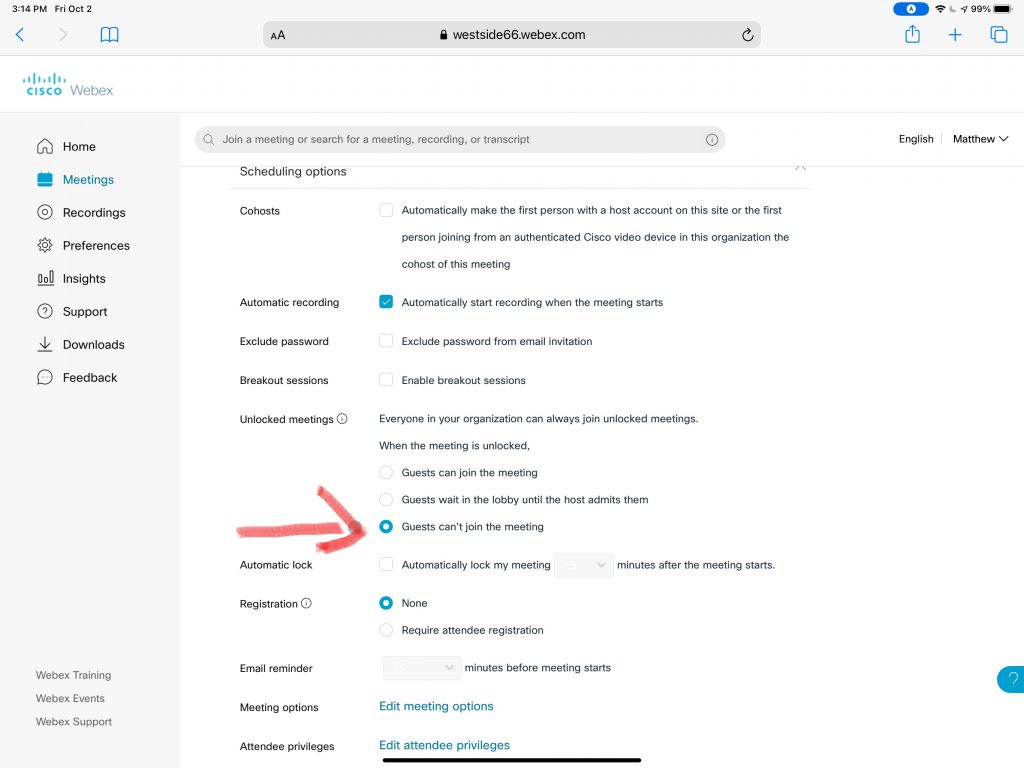
Option 3: Default Security
This is the standard level of security for all Westside created meetings. By default, scheduled meetings are unlocked but participants need the meeting link and password to join. This option prioritizes getting students into their class meetings quickly without a lot of interaction from the teacher, letting you focus on your class, not webex.
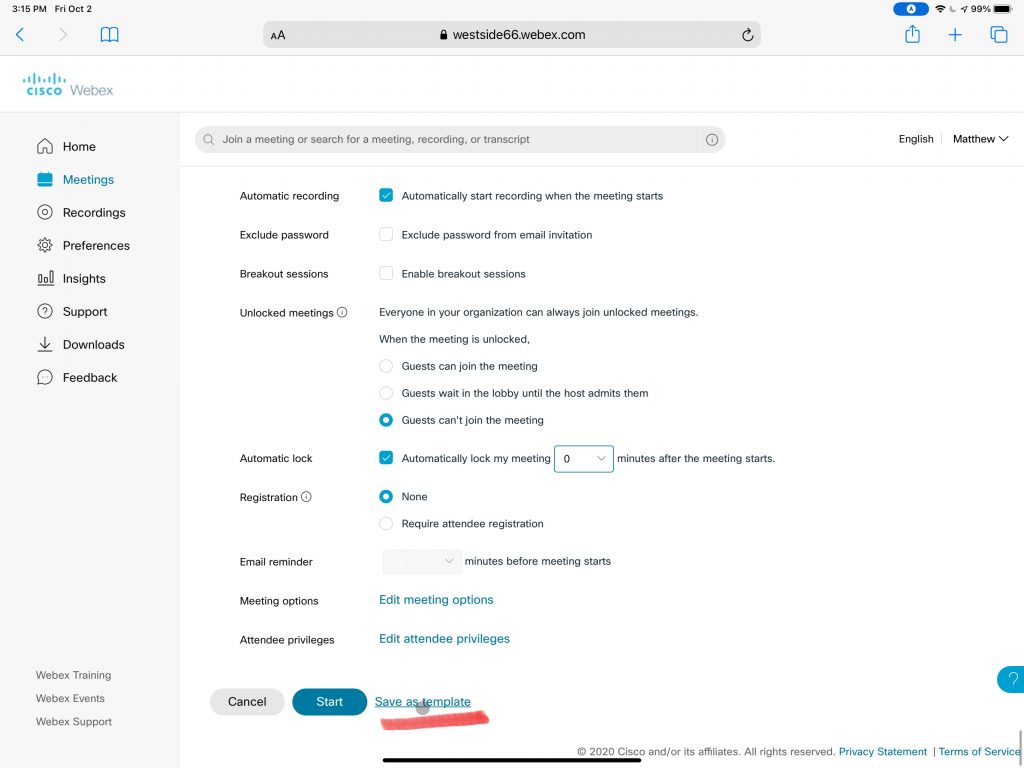
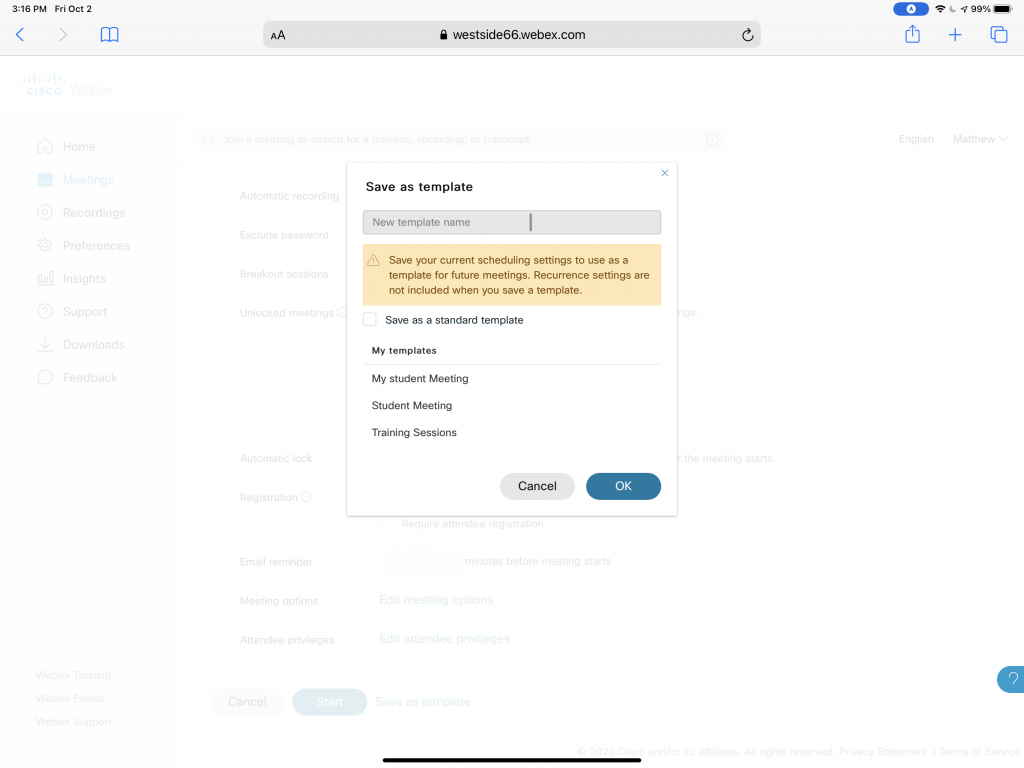
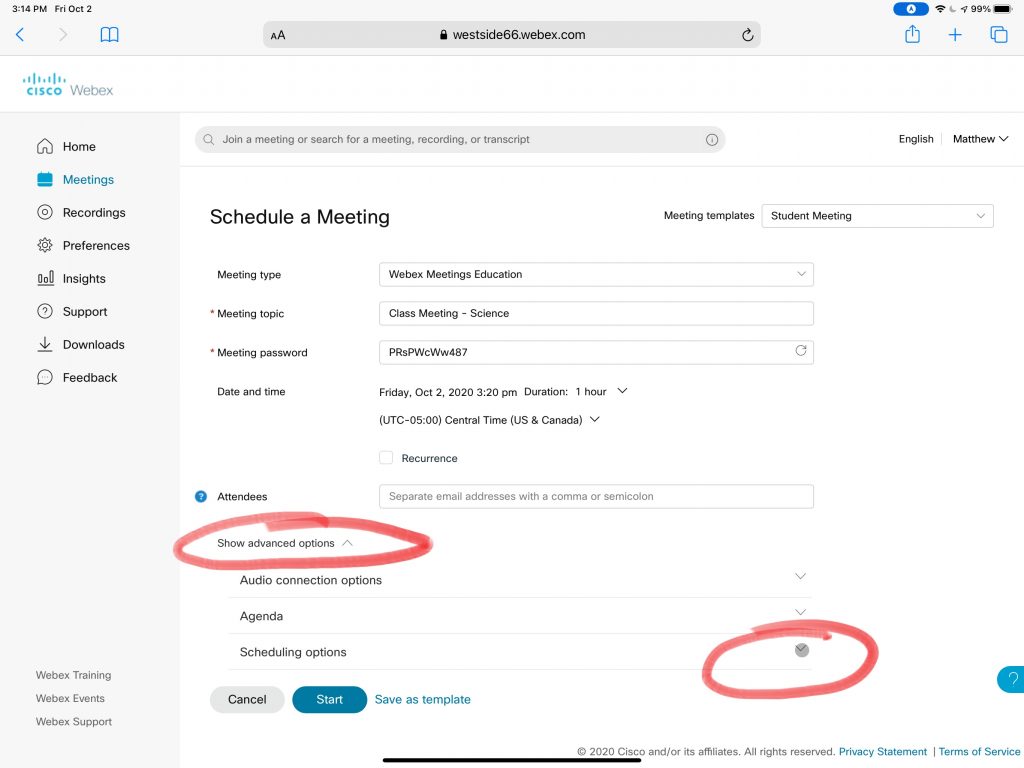
Saving Preferences as a Template
Once you have your meeting security preferences set for a meeting, you can create a meeting template. Templates allow you to automatically set a variety of settings AUTOMATICALLY each time you create a meeting.
To create a template:
- Set your meeting security settings as describe above.
- Click ‘Save as Template’
- Enter a name for your template (i.e., Student Meetings-No Guest, or the like)