

For the month of October, the eMerge theme is ‘Creation’. Below you will find tutorials created by several eMerge members that show quick, easy ways that you can get your students to create content on their iPads. Creating is a great way for them to demonstrate their learning!
Pic Collage by Joy Fuller
- Find the APP, Pic Kids and tap on the blank collage to create a new collage
- There will be a tutorial page the first time you use it.
There are five different features on the screen.
The trashcan in the upper right corner, you can flick things there to delete them.
The bottom right corner has a box with an arrow pointing up. That is to save or share your Collage
The arrow on the bottom is to add photos or videos
The bottom left bottom button with the box is to add layouts and backgrounds.
The top left arrow will take you back to all collages.
- To add text, push the plus sign, then touch the bottom that is pink and says Aa. From this page you can type words, change the color of your text, and change the font.
- Too add a layout, you can push the box on the bottom left and pick the layout that works best for your collage.
- To add a background you push the plus sign, and touch background.
- To add a photo you have to go to safari, then search for a photo, and save it to your camera roll. Then go back to Pic Kids, and push the plus sign, touch photos, it will take you to our camera roll and you can choose the photo you saved.
- You could also have students draw in Drawing Pad, save that and upload their illustration as well.
Using Drawing Pad and Explain Everything for writing by Breanne Parker
We used Drawing Pad and Explain Everything for our Procedural Writing Unit. Students drew their pictures for each step in drawing pad then imported their pictures to Explain Everything. Students then typed and recorded their procedural text. This can be used for many different writing products in both Primary and Intermediate Grades.
Drawing Pad
Step 1 – Click New (Green Button)
Step 2 – Choose your drawing utensil and create
Step 3 – When finished with your illustration and read to save click on the home icon and scroll down to the light green export button and click
Step 3 – Save to the camera roll (3rd button down with photo)
Step 4 – Create all your illustrations and save to the camera roll
Explain Everything
Step 1 – Click on Explain Everything
Step 2 – Click on the + button to create new – Choose a template
Step 3 – On the left sidebar click on the + symbol then choose photo/video/file Step 4 – Click photos and choose your illustration from the photo library
Step 5 – Click done when photo appears in Explain Everything
Step 6 – To add text click the A symbol and touch where you would like the text Step 7 – Type your text
Step 8 – To add more pages within the same produce click the + symbol at the bottom of the page next to the slide menu
Step 9 – To add audio click on the red record button and read the text
Step 10 – Repeat recording for each page
Step 11 – To export and save click on the export button on the right side of the bottom with the arrow pointing up
Step 12 – Save to the photo library
Using Explain Everything for Math by Molly McMeekin
I have found Explain Everything to be very beneficial in math. Here are three ways I have used it. For the first one, I just have an explanation. For the second way, I have included a video example from one of my students. With example number three, I have included a picture of how my student’s used the app.
1.) Explain Everything As a White Board for Guided Practice
- Students open a blank page.
- I give them 10 seconds to choose one color and a background to use for the entire guided practice.
- They copy and complete the problems we are doing together
- Students can share their answers and EXPLAIN THEIR THINKING of how they got to their answer to the class. They use the pointer tool and Airplay to project their screen to the class, when sharing.
2.) Explain Everything for Students Teaching Students
- Students can explain a concept or process by using the record feature on the iPad.
- This can be used for students to demonstrate knowledge of a concept, or for peer-to-peer teaching.
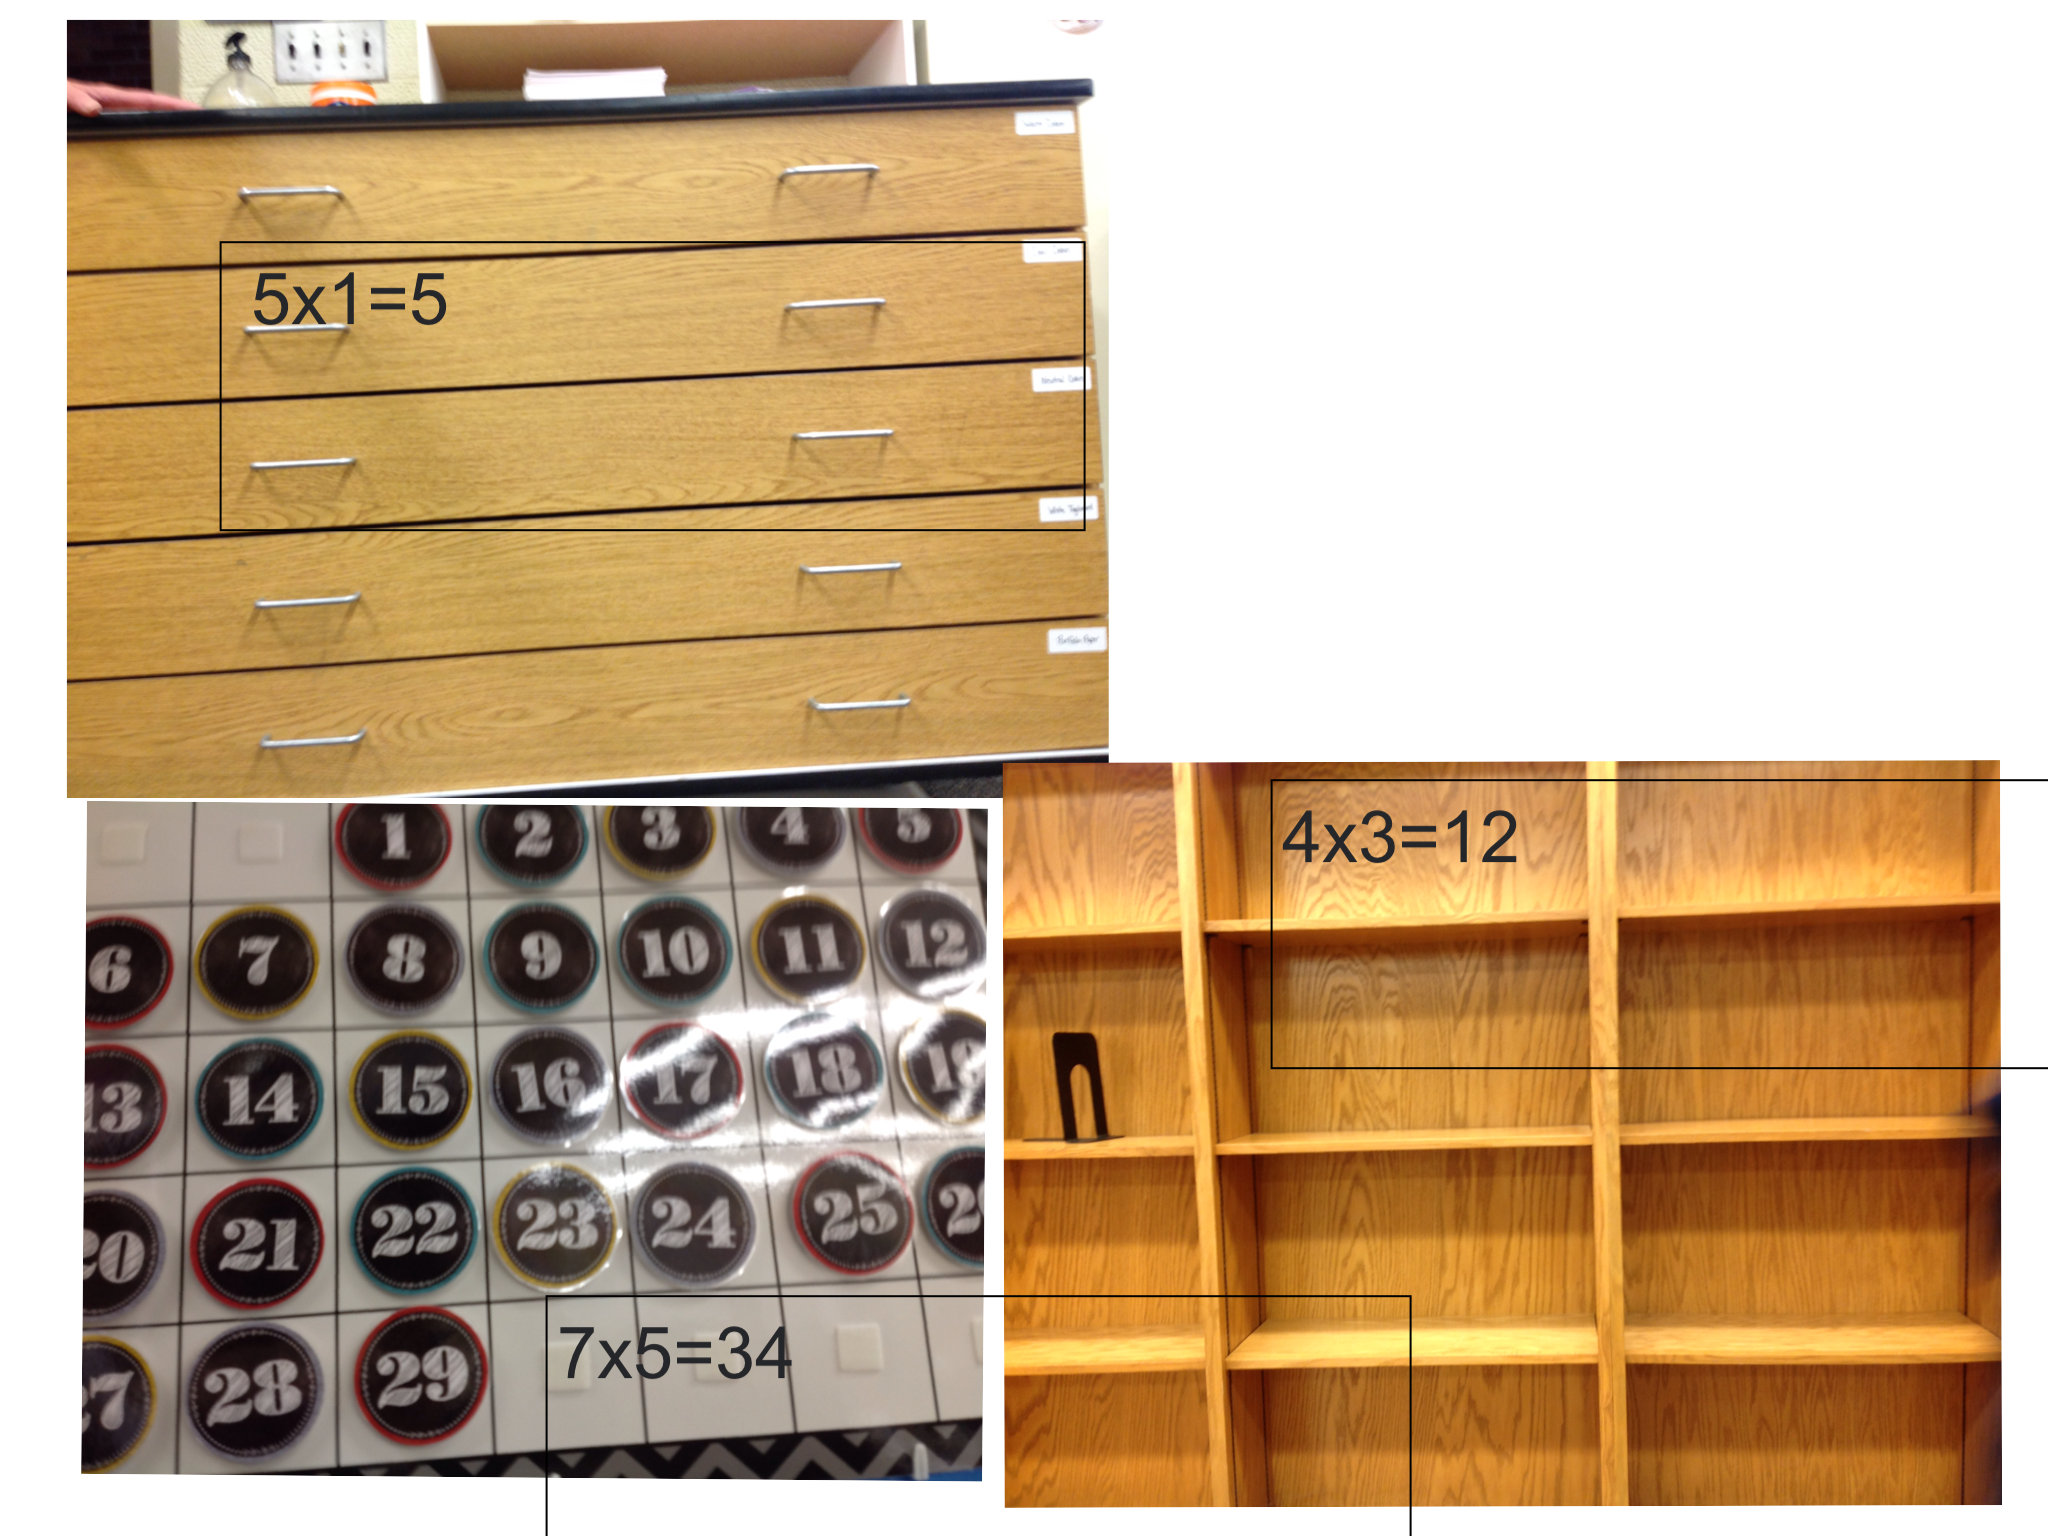
3.) Explain Everything for Arrays (or other math concept)
- For things like arrays and symmetry, students can use their iPads to take pictures of real-life situations that show this.
- They can then upload their photos to Explain Everything and label with arrows, pointers, and words or numbers to explain their picture.
If you have any questions, please contact Molly McMeekin at mcmeekin.molly@westside66.net